Stickers can be versatile tools in ceramics, allowing fine details in various applications, such as underglazes, and glazes.
- Stencil Application:
Using stickers as resist areas allows for precise and intricate designs. Here's how you can achieve fine detail in your application:
a. Surface Preparation: Dry Bisqueware provides the easiest application. Greenware is also a suitable choice but takes a bit more practice to get the hang of application.
b. Selecting Stickers: Choose stickers that suit your design. Fine-line stickers or custom-cut vinyl stickers work well for intricate patterns and delicate details.
c. Application Process: Place the stickers on the areas where you want to resist the glaze or underglaze. Press them firmly to ensure they adhere securely.
Glazes, Underglazes and Sticker Resist for Fine Detail:
One of the most common ways to use sticker stencils in pottery is by incorporating them into the underglazing process. Begin with a bisque-fired/greenware piece and secure the stickers, paint over the entire piece. The stickers act as a resist, preventing the layer of underglaze from adhering to the areas covered by the stickers. Once the underglaze has dried, peel off the stickers to reveal the intricate design beneath.

If you have ordered a more complex sticker from my website you will receive it with premasking tape applied. This is done when the stencil has more than one piece and the premasking tape is needed to hold the design together.

You should take a card or rib and rub over the premasking tape to ensure the sticker is fully transferred to the premasking tape.

Once you have ran over the stencil with a rib flip it over so the premasking tape is facing the table (this is very important!) and fold over the white backing to peel away as shown in the photo above.

Because I do most of my designs on mugs I like to then trim the premasking tape and cut slits (as shown above) to help the design wrap around.This is not necessary on a flat surface.

Apply the transfer, and pull the premasking tape off folded over as shown above.

For Bisqueware: use a rib and run over the design before pulling off the premasking tape
For Greenware: this is a little more tricky. As you pull off the premasking tape, use your thumb or a needle tool to help guide the stencil onto the pot.

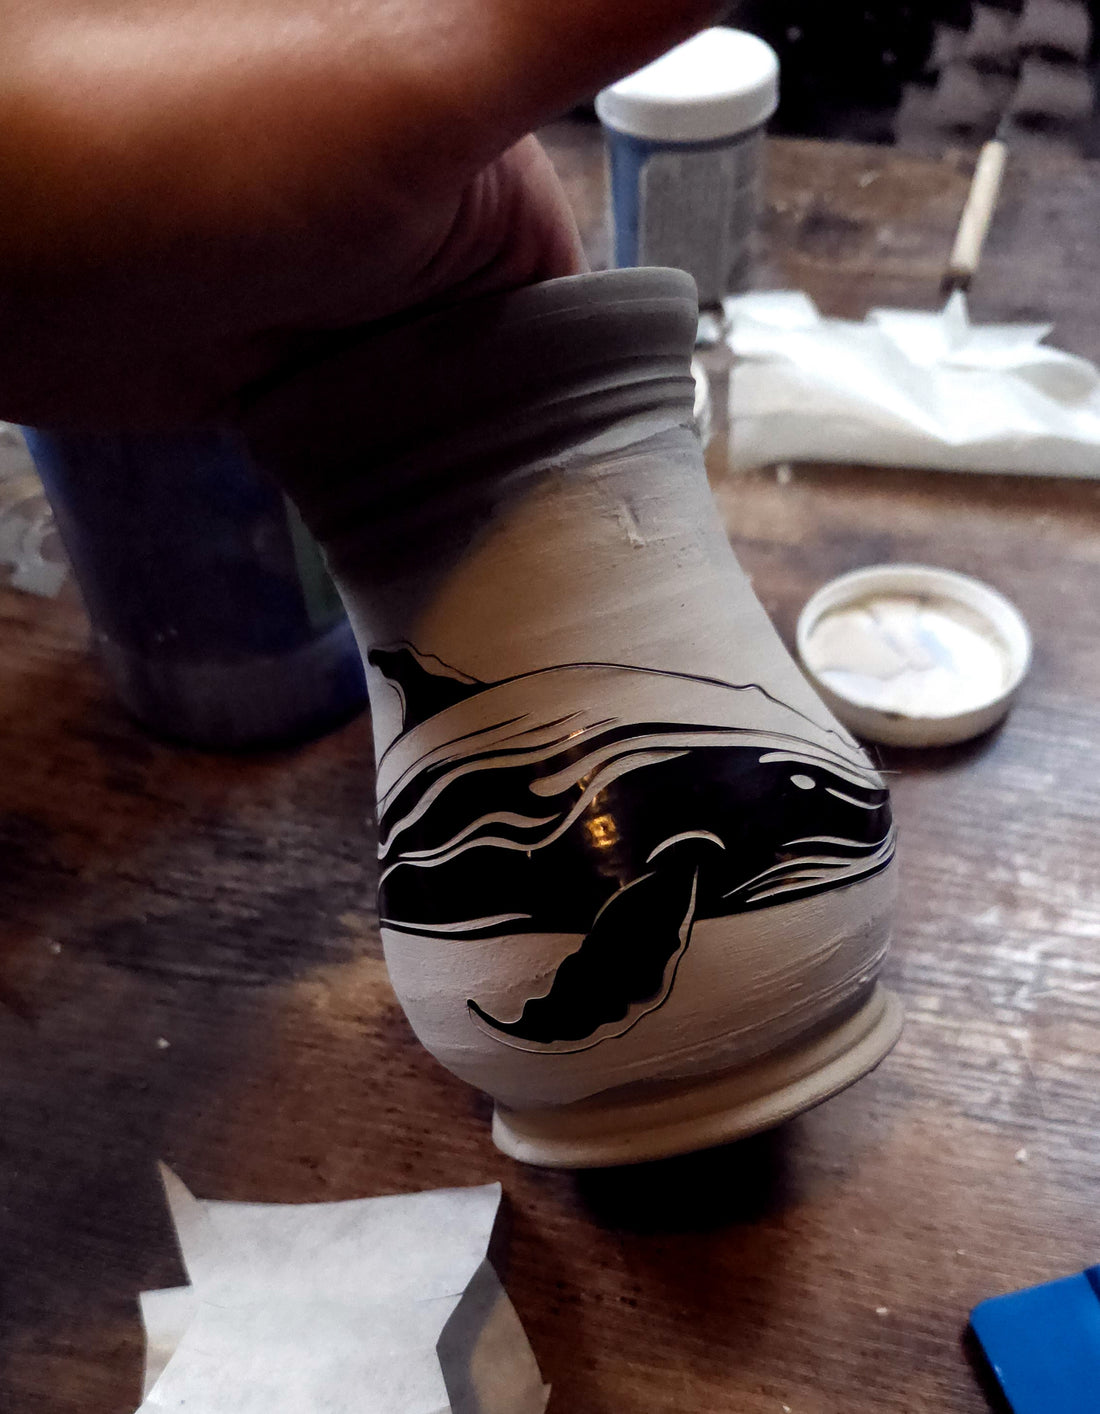
this stencil in this photo was applied to greenware.

Paint to your hearts content.

peel away the sticker with the help of a needle tool

this sticker was applied during the greenware stage. I will fire it, paint the rest of the whale, amd outline the detail with black underglaze and a fine tip paintbrush and Viola, a whale swimming through deep ocean waves!
These stickers can be used with glaze and underglaze, bisque and greenware. An Easy fun way to bring detailed images to your ceramics!